Mostly because I hated to see any plums wasted (and wasn't brave enough to try canning yet!) I decided to make a plum wine.

I gathered as many plums as I could from my little tree. My recipe (making about eight gallons) called for three pounds per gallon. I took the average weight of my plums, and I realized I needed about 150 plums. I called my friend C and asked if he had any plums. He did, so I ran over to his home with a bucket. We had a great time gathering plums from his much larger tree, including him climbing on the roof and throwing them down to my bucket, mostly getting them in!

With both lots, I sliced and squeezed them into the buckets. I left on the skins for color and the stones for tannins. It's messy fun work.
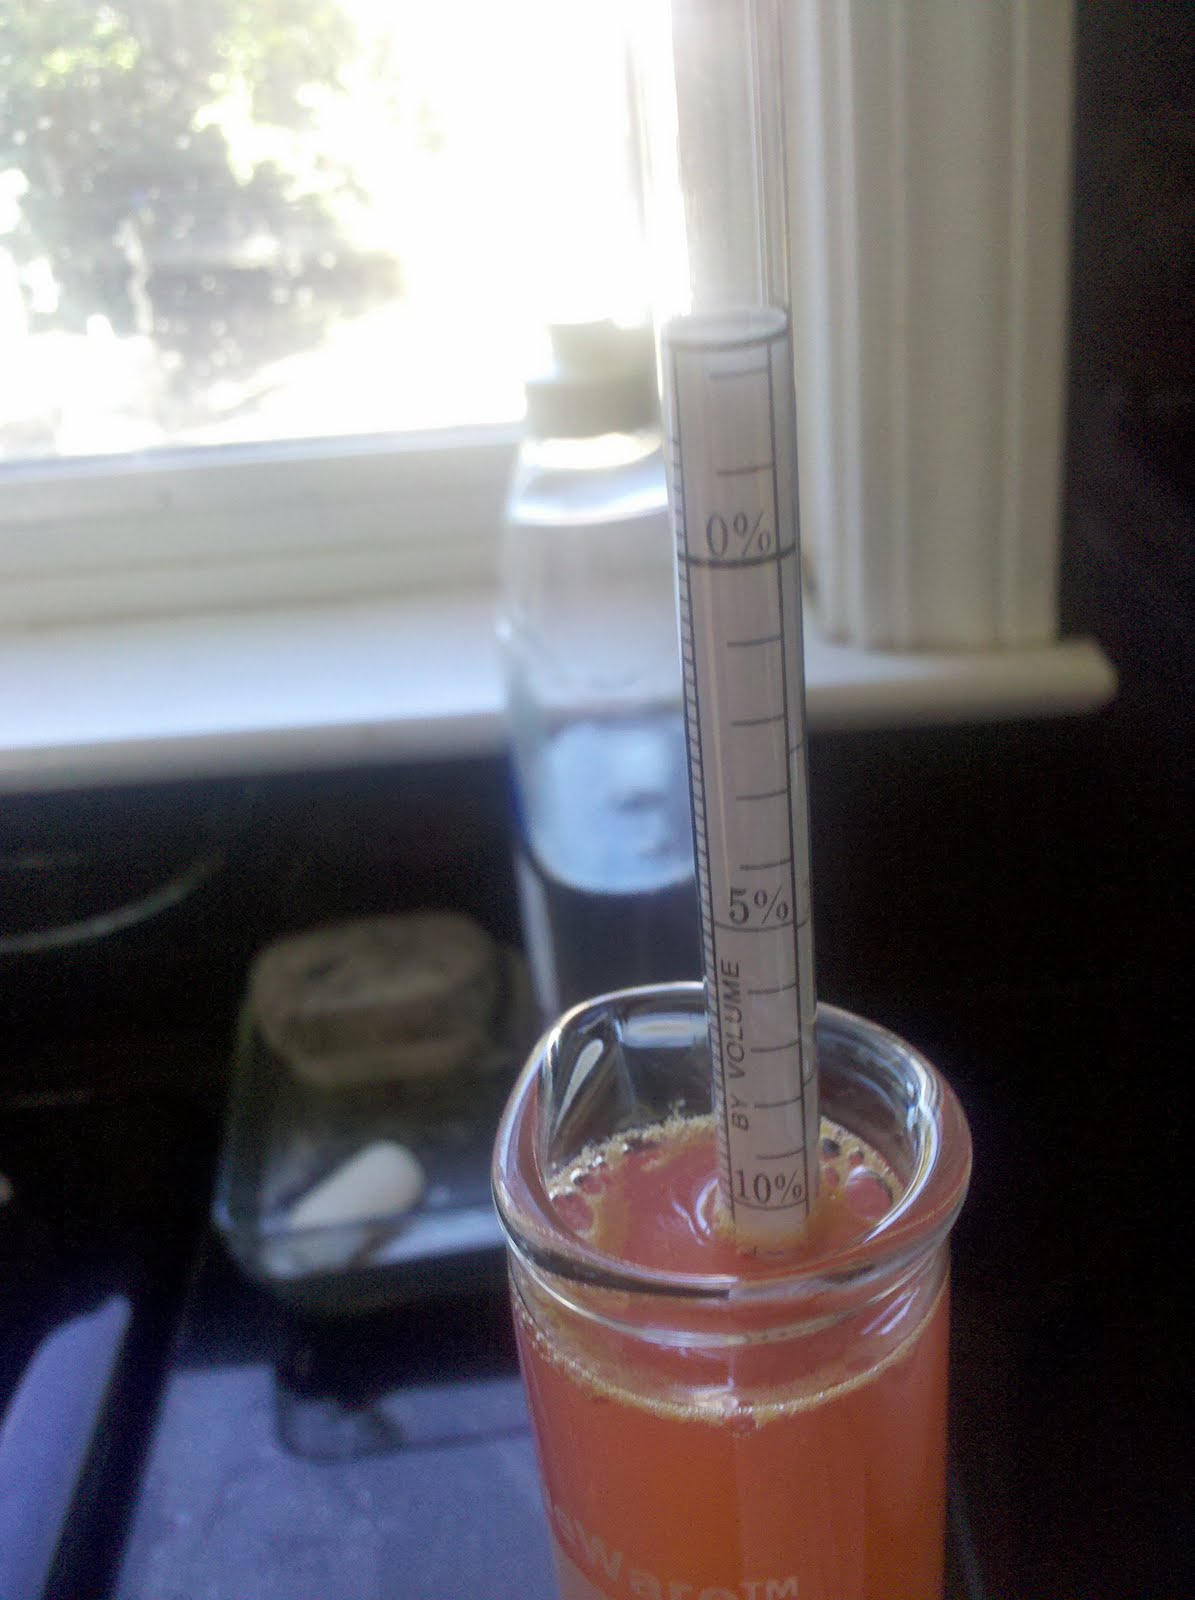
I took a quick Specific Gravity reading of the plums from just my house. We do this to find out the potential alcohol content. The wine needs enough alcohol to be a preservative, but too much and it's jet fuel. The Specific Gravity (or SpGr) reads the density of the sugar in the solution, also known as the brix. By knowing how much sugar we start with, we can roughly calculate how much alcohol we will end up with since we know how yeast converts sugar to alcohol.

The hydrometers for beer and wine making also have potential alcohol printed on them as well.
The plums at C's house had a closer potential alcohol of about 13%, we ended up with an overall potential alcohol of 12%, which is right where we wanted it.

All of the plums, most of the bottle of orange juice, and five pounds of sugar were mixed together with boiling water and six campden tablets to sterilize. It was allowed to sit overnight.

Before adding the yeast, I took one more SpGr reading. Mostly, I'm impressed by the color. That is pink!

Yeast decision time. I read on one site "All purpose wine yeast for full bodied reds and whites, and for fruit wines. Excellent complexity. Very nice with plum, rhubarb wine, merlot, chard zinfandel." and my decision was made, Montrachet it was!
The yeast was added to some of the orange juice that was set aside, and once it was bubbling, it was added to the plum juice. Montrachet yeast is a slow yeast, which is good - I haven't had it explode on me! The morning after innoculation, it had some bubbles.

Later that night, a proper cap had formed.

For the next two weeks, the wine fermented away. A few times a day, the cap was punched down. (this is wine talk for "we stirred it".) After two weeks, it was ready for racking (moving) into the six gallon carboys it will age in.
...two weeks later...
The racking was going smoothly, but then we ran into trouble. The bulk of the free liquid was gone, and we weren't to the top of the carboy yet.

What was left in the bucket was the leftover fruit and stones.

Time to strain and then add the juice. The bad thing about this is it leads to heavy amounts of sediment, something each racking is designed to clear up, but at the cost of volume.

We were able to collect enough juice to fill the carboy.

The 2010 plum wine was added to the other carboys for aging. We use Mardi Gras beads to label each of the wines. So pink compared to the other wines!
No comments:
Post a Comment